Contributing to DaxLib
How to contribute a Library to DaxLib
Dax Lib, a centralized repository of DAX UDF libraries, has just announced a new type of library - Medium/Large. I will show the processes of how to submit a Small library, then how to move from a Small to Medium/Large library, and explore why you might want to do this.
Small library
In this mode you develop your library on a personal fork of daxlib/daxlib (i.e evaluationcontext/daxlib), then submit a pull request to daxlib/daxlib to submit your library, and your library will be released to Dax lib. There is a guide on how to contribute a small library to DAX Lib.
The process is as follows:
sequenceDiagram
    participant DaxLib as daxlib.org
    participant Main as daxlib/daxlib
    participant Fork as evaluationcontext/daxlib

    Main->>Fork: 1. Fork repository
    Fork->>Fork: 2. Develop library
    Fork->>Main: 3. Submit pull request
    Main->>Main: 4. Review & merge
Main->>DaxLib: 5. Package deployed- Go to daxlib/daxlib github repo, and create a fork
- Create a folder within packages, for your library, and add/update the relevant files
daxlib/daxlib package
The example below shows the structure of the daxlib/daxlib repo, showing only the relevant items
└── 📁 packages
    |── 📁 a
    ├── 📁 ...
    ├── 📁 e
    │    └── 📁 evaluationcontext.colour // (1)!
    │         ├── 📁 0.1.0
    │         └── 📁 0.1.1
    │              ├── 📁 lib
    │              │    └── functions.tmdl // (2)!
    │              ├── 📄 icon.png // (3)!
    │              ├── 📄 README.md // (4)!
    │              └── 📄 manifest.daxlib // (5)!
    ├── 📁 ...
    └── 📁 z
- Your library
- Required - Your DAX UDF functions
- Optional - Icon for your library
- Optional - Docs for your library
- Required - Declares package properties
Required: Contains TMDL definition of the functions within your library
Naming Convention
There are some guidelines on DAX UDF naming conventions
Annotation
TDML script must not have CreateOrReplace keyword
Functions must have the following annotations:
/// Int to Hex conversion
/// number INT64 The integer to convert
/// padTo INT64 Optional: Minimum number of characters in result
function 'EvaluationContext.Colour.Int.ToHex' =
(
number: INT64,
padTo: INT64
) =>
VAR MinPadding = IF( number = 0, 1, CEILING( LOG( number + 1, 16 ), 1 ) )
VAR ActualPadding = MAX( MinPadding, IF( ISBLANK( padTo ), MinPadding, padTo ) )
VAR BitTable = GENERATESERIES( 1, ActualPadding )
VAR Hex =
CONCATENATEX(
BitTable,
VAR c = MOD( TRUNC( number / POWER( 16, [Value] - 1 ) ), 16 )
RETURN
SWITCH( c, 10, "A", 11, "B", 12, "C", 13, "D", 14, "E", 15, "F", c ),
"",
[Value],
DESC
)
RETURN Hex
annotation DAXLIB_PackageId = EvaluationContext.Colour
annotation DAXLIB_PackageVersion = 0.1.2-beta
...
Required: The package properties in JSON format
{
"$schema": "https://raw.githubusercontent.com/sql-bi/daxlib/refs/heads/main/schemas/manifest/1.0.0/manifest.1.0.0.schema.json",
"id": "EvaluationContext.Colour",
"version": "0.1.2-beta",
"authors": "Jake Duddy",
"description": "A comprehensive set of User-Defined Functions designed to enable easy manipulation of hex colours",
"tags": "DAX,UDF,colour",
"releaseNotes": "Added Documentation page and `EvaluationContext.Colour.Hex.Interpolate` function",
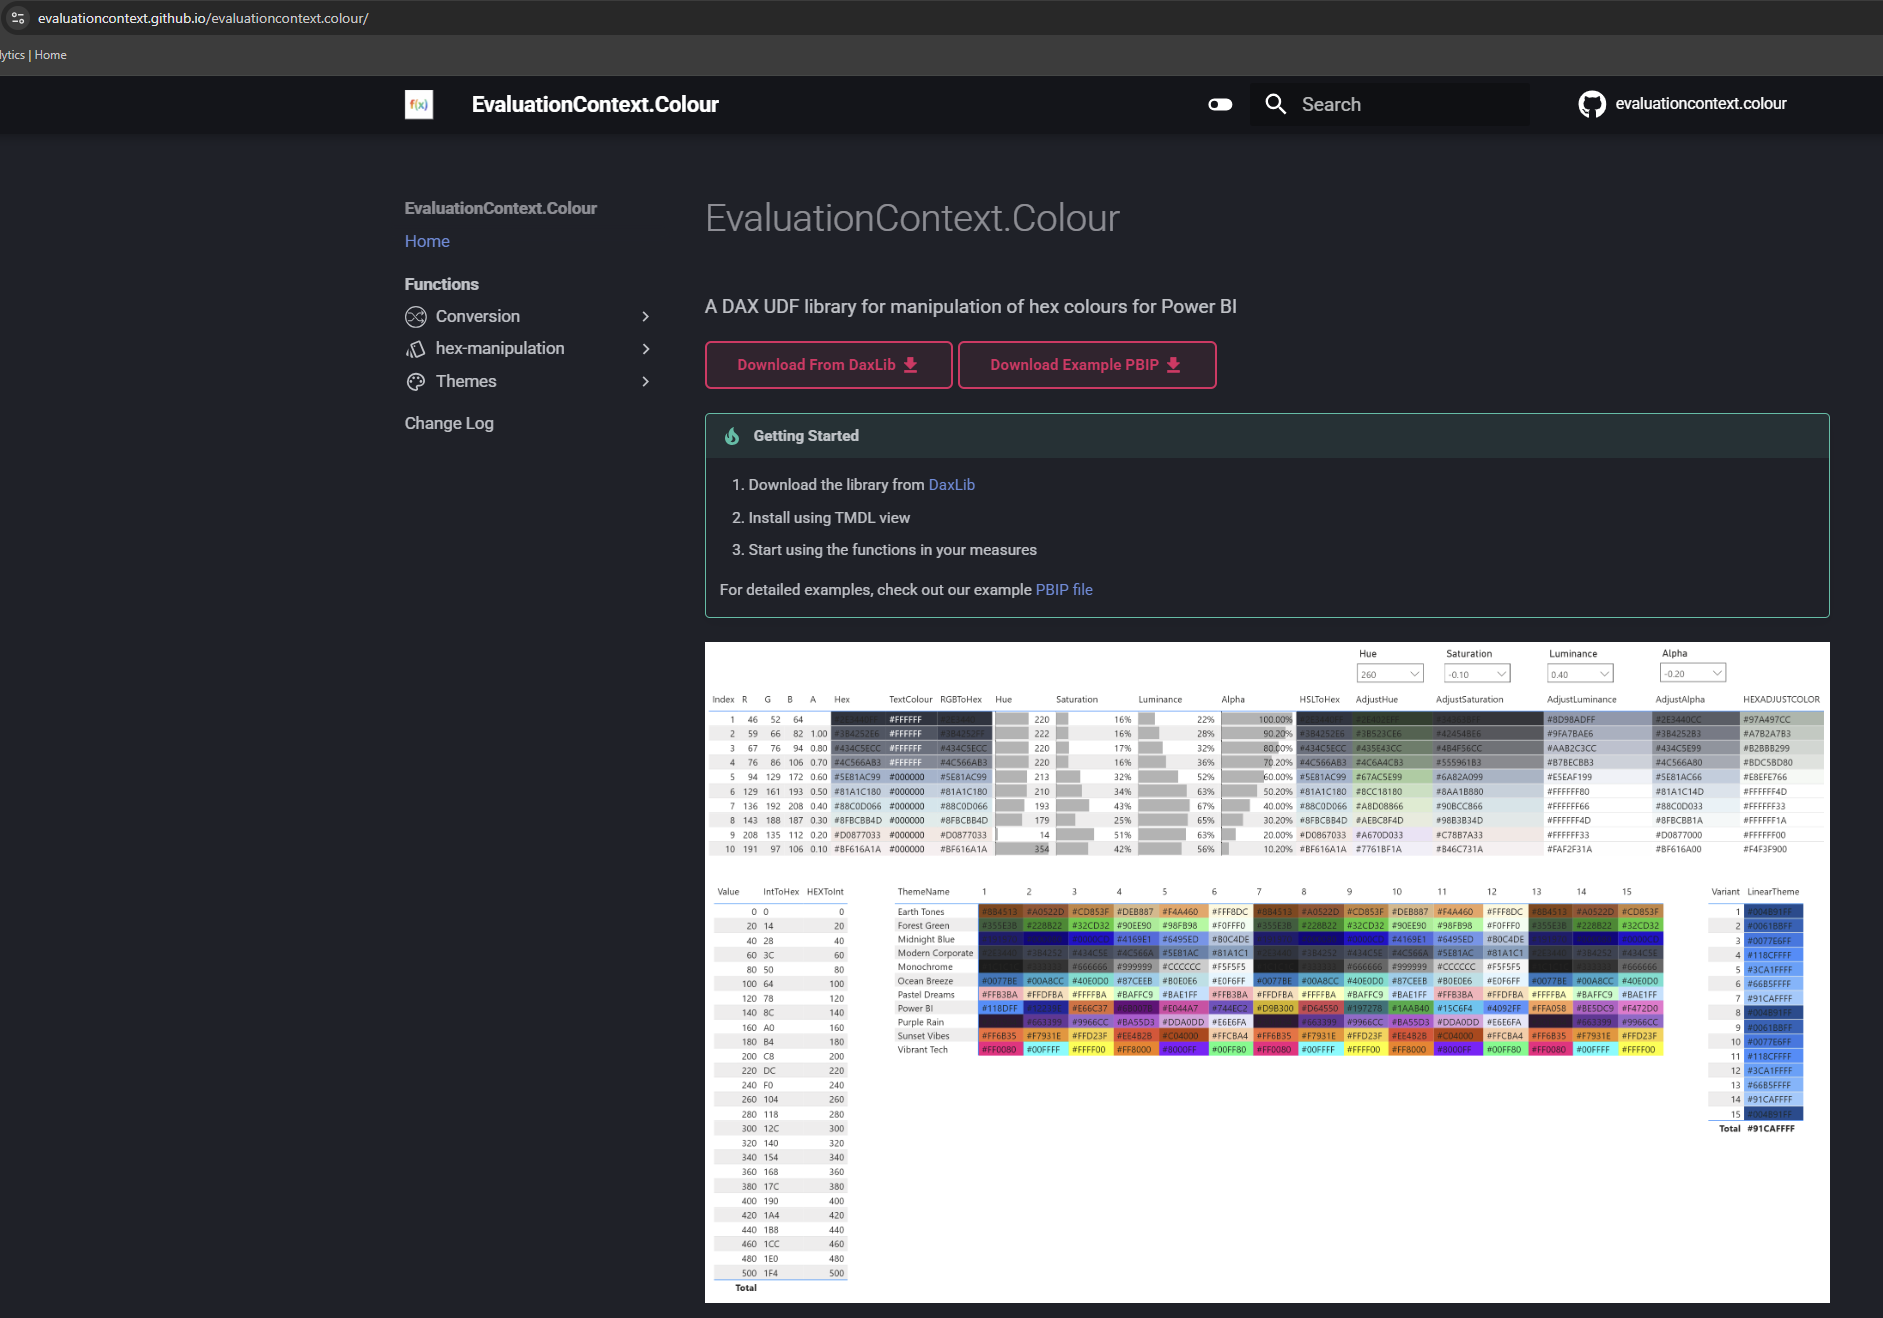
"projectUrl": "https://evaluationcontext.github.io/EvaluationContext.Colour/",
"repositoryUrl": "https://github.com/sql-bi/daxlib/tree/main/packages/e/evaluationcontext.colour",
"icon": "/icon.png", // (1)!
"readme": "/README.md" // (2)!
}
- Required if you include a
icon.pngfile - Required if you include a
README.mdfile
Optional: icon for library
Remarks
The icon file must be in PNG format (.PNG), with a maximum size of 100 KB
Optional: Markdown docs file, with general information about the library, usage instructions, examples, and any notes for users
Remarks
The file must be in Markdown format (.MD), with a maximum size of 100 KB
For security reasons, only a limited set of Markdown features are supported, and external links may be restricted to trusted domains
- When you are ready to publish a version of the library, submit a pull request from your
forktodaxlib/daxlib - After approval your library will appear on DAX Lib for other to download and use
Packages are immutable
After a pull request has been accepted, Packages are immutable. If you want to submit any changes to functions or files, a new version (i.e. v0.1.0 v0.2.0 ) must be created, and function annotations and manifest.daxlib must be updated with the new version number. Changes can then be submitted with a new pull request.
Medium/large Library
The process for Medium/Large libraries uses a extended workflow.
We still need a fork of daxlib/daxlib (i.e. evaluationscontext/daxlib), and will still submit a pull request to daxlib/daxlib to publish a library.
The difference is that development of the library will occur on a fork of daxlib/lib-quickstart-template (one per library i.e. evaluationcontext/evaluationcontext.colour). A github workflow can be run on evaluationcontext/evaluationcontext.colour, which will push the library to a new, version specific, branch of evaluationcontext/daxlib, which can then be submitted via a pull request to daxlib/daxlib.
sequenceDiagram
    participant DaxLib as daxlib.org
    participant Main as daxlib/daxlib
    participant Fork as evaluationcontext/daxlib
    participant LibRepo1 as evaluationcontext/evaluationcontext.colour

    Main->>Fork: 1. Fork repository
    LibRepo1->>LibRepo1: 2. Develop library
    LibRepo1->>Fork: 3. Workflow creates branch
    Fork->>Main: 4. Submit pull request
    Main->>Main: 5. Review & merge
    Main->>DaxLib: 6. Package deployed
Why Create a Medium/large Library?
Since you have a specific repo dedicated to your library you are able to:
- Connect with your users with GitHub issues
- Collaborate with others to develop the library
- Add documentation site and host (for example) on GitHub Pages
- Opens the door for auto-documentation generation
Creating a Medium/large Library
Creating a Library Repo
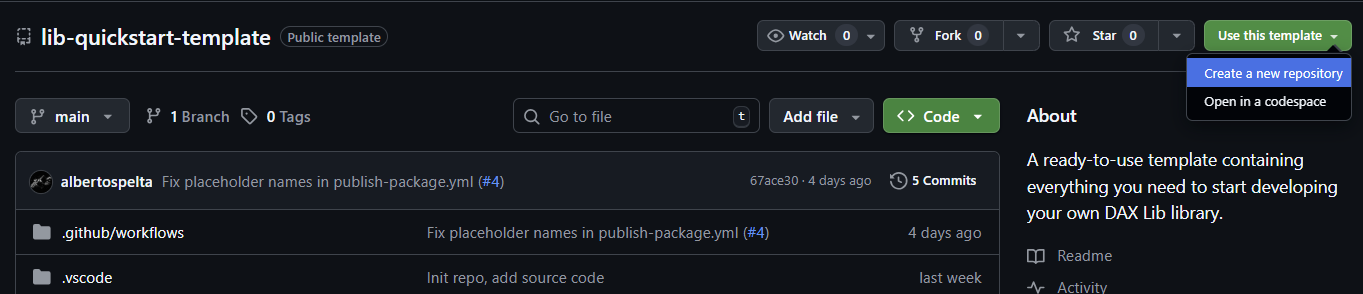
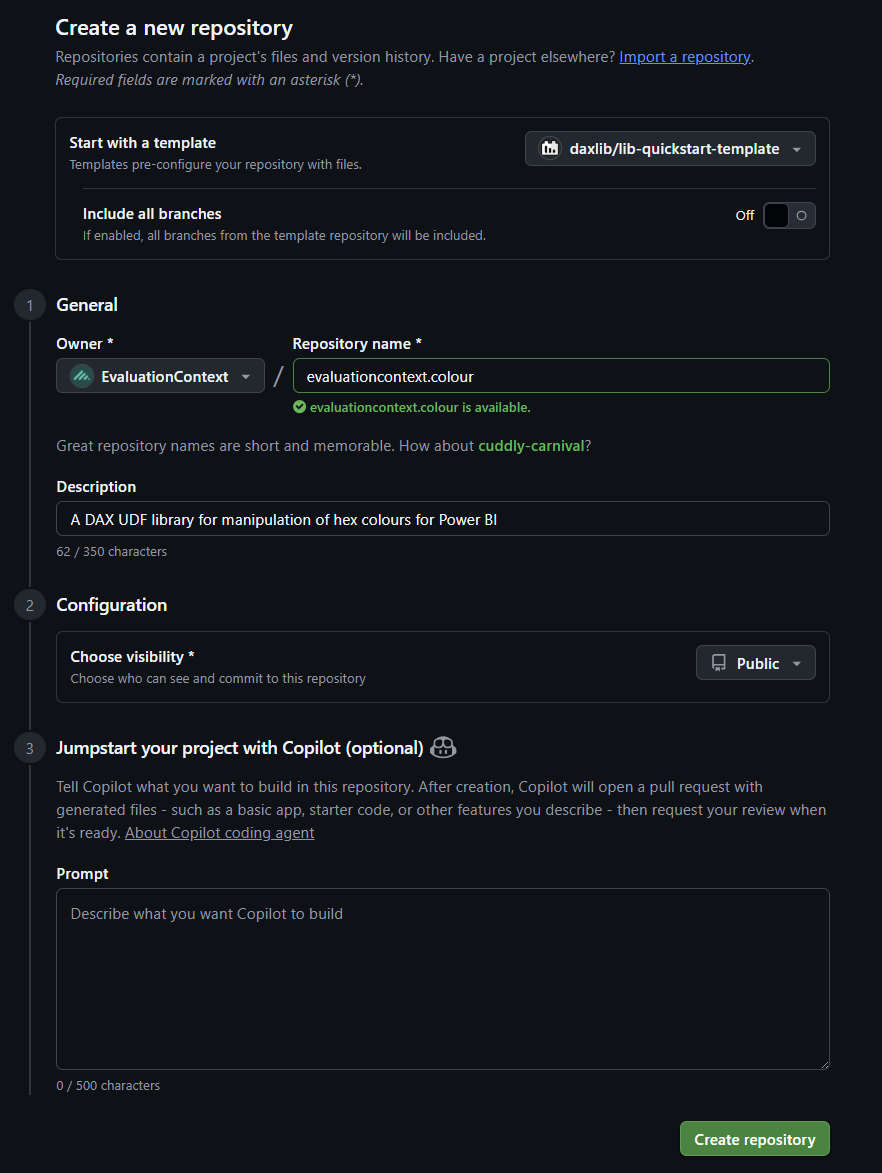
Let's start by creating a development repo ( evaluationcontext/evaluationcontext.colour) from daxlib/lib-quickstart-template. This is where we can develop our library.
Modifying Repo
Now we have a development repo we need to update it's content.
- Go to vscode and run
git clone https://github.com/EvaluationContext/evaluationcontext.colour.git
daxlib/lib-quickstart-template structure
We can see the structure is slightly different, but the required content remain the same, except your library now lives in the src folder
├── 📁 .github
│    └── 📁 workflows
│        └── 📄 publish-package.yml // (1)!
└── 📁 src // (2)!
     ├── 📁 lib
     │    └── functions.tmdl // (3)!
     ├── 📄 icon.png // (4)!
     ├── 📄 README.md // (5)!
     └── 📄 manifest.daxlib // (6)!
- Workflow to create a pull request to daxlib/daxlib repo
- Your library
- Required - Your DAX UDF functions
- Optional - Icon for your library
- Optional - Docs for your library
- Required - Declares package properties
- Since I already have a Small Library I can copy the files to
srcfolder - Since this will be a new version I need to update the version number in
manifest.daxlib(0.1.2-beta 0.1.3-beta) - I can also update the main repo
README.mdto give specific info about this library
Annotation Placeholders
We are able to replace the annotation values in functions.tmdl with placeholders. These will be overwritten by the version specified in manifest.daxlib when running the publish-package.yml workflow.
Adding a Docs Site
For my version of the library docs I used Jekyll and the Just the Docs theme, primarily because I have been using the chirpy Material for my blog. But I have recently transitioned my blog over to the Material Theme for MKDocs, as it has some really nice functionality, and faster build times. So lets quickly add a Material for MKDocs site definition to the repo.
Material for MKDocs
The Material for MKDocs docs site give really good documentation for how to create a site and clear explanation of all the features and how to use them. Additionally this video series is very good at getting you started.
I am going to some files to define the site to the repo:
├── 📁 .devcontainer // (1)!
│    ├── 📄 devcontainer.json
│    └── 📄 Dockerfile
├── 📁 .github
│    └── 📁 workflows
│        ├── 📄 publish-package.yml
│        └── 📄 ci.yml // (3)!
├── 📁 src
│    ├── 📁 lib
│    │    └── functions.tmdl
│    ├── 📄 icon.png
│    ├── 📄 README.md
│    └── 📄 manifest.daxlib
├── 📁 docs // (4)!
│    ├── 📄 index.md
│    └── 📄 ...
├── 📁 PowerBI // (5)!
│    ├── 📄 Model.pbip
│    └── 📄 ...
├── 📄 mkdocs.yml // (7)!
├── 📄 requirements.txt // (2)!
└── 📄 .gitignore // (6)!
- Dev Container configuration for containerized development
- Python dependencies for MKDocs and Material theme
- GitHub workflow to build and deploy site to
gh-pagesbranch - Markdown files for all site pages
- Power BI Project file for function testing and examples
- Ignore PBIP and MKDocs specific files
- Site configuration
Once I have everything setup I can run the run the site in the Dev Container.
Dev Container dependencies
To run dev containers you need Docker Desktop installed. Additionally if you are running on Windows you will need to install Windows Subsystem for Linux (WSL).
Since MKdocs runs on python, you could could install python, and pip install the dependencies, on your machine without a container.
Once the container is built I can go to the terminal and serve the site on localhost.
Then view the site at http://localhost:8000/ and test to make sure the site is functioning correctly.

Then we can push to GitHub, this will run the ci job, which will execute mkdocs build, generating the html pages, and saving the result to a gh-pages branch.
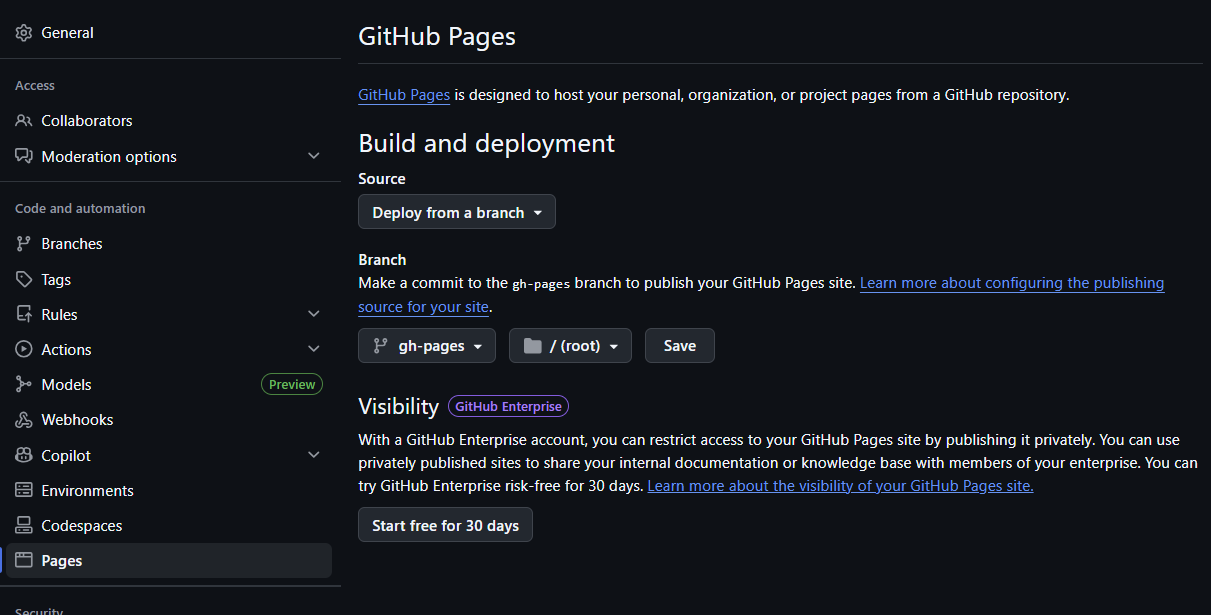
We can now setup GitHub pages to use the gh-pages branch as a source to deploy our site, by selecting Setting from the top nav bar of the Git Hub repo, select pages and set Deploy from a branch and set the branch to gh-pages, and select save.
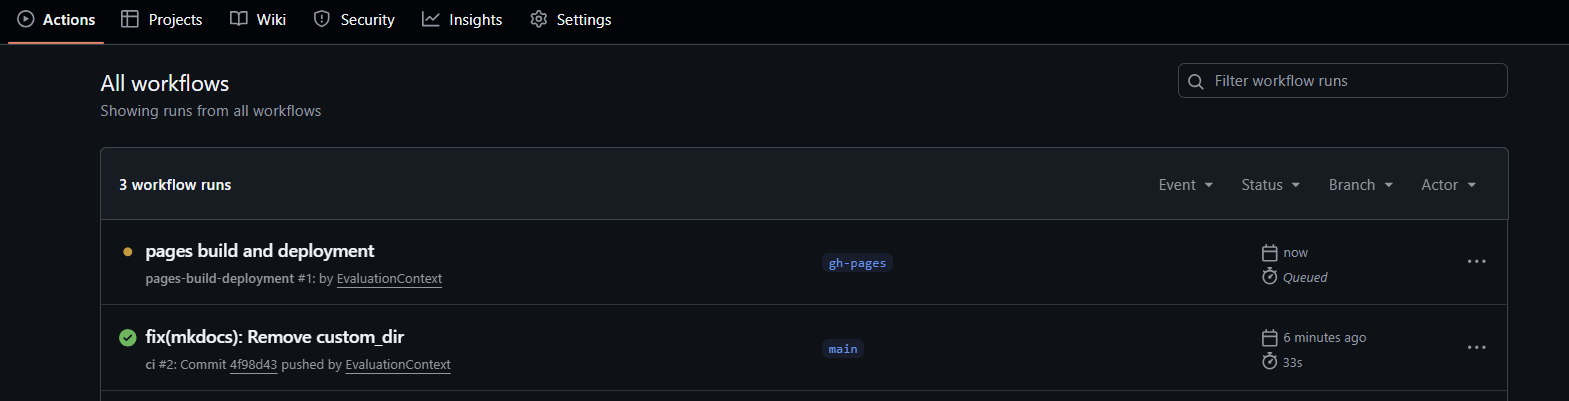
We will see a pages build and deployment action kick off, which will deploy the site.
Then we can navigate to our site URL and confirm it deployed successfully.
Deploying Library
After that brief detour, we can deploy the library by following the Publish Your Library guidance.
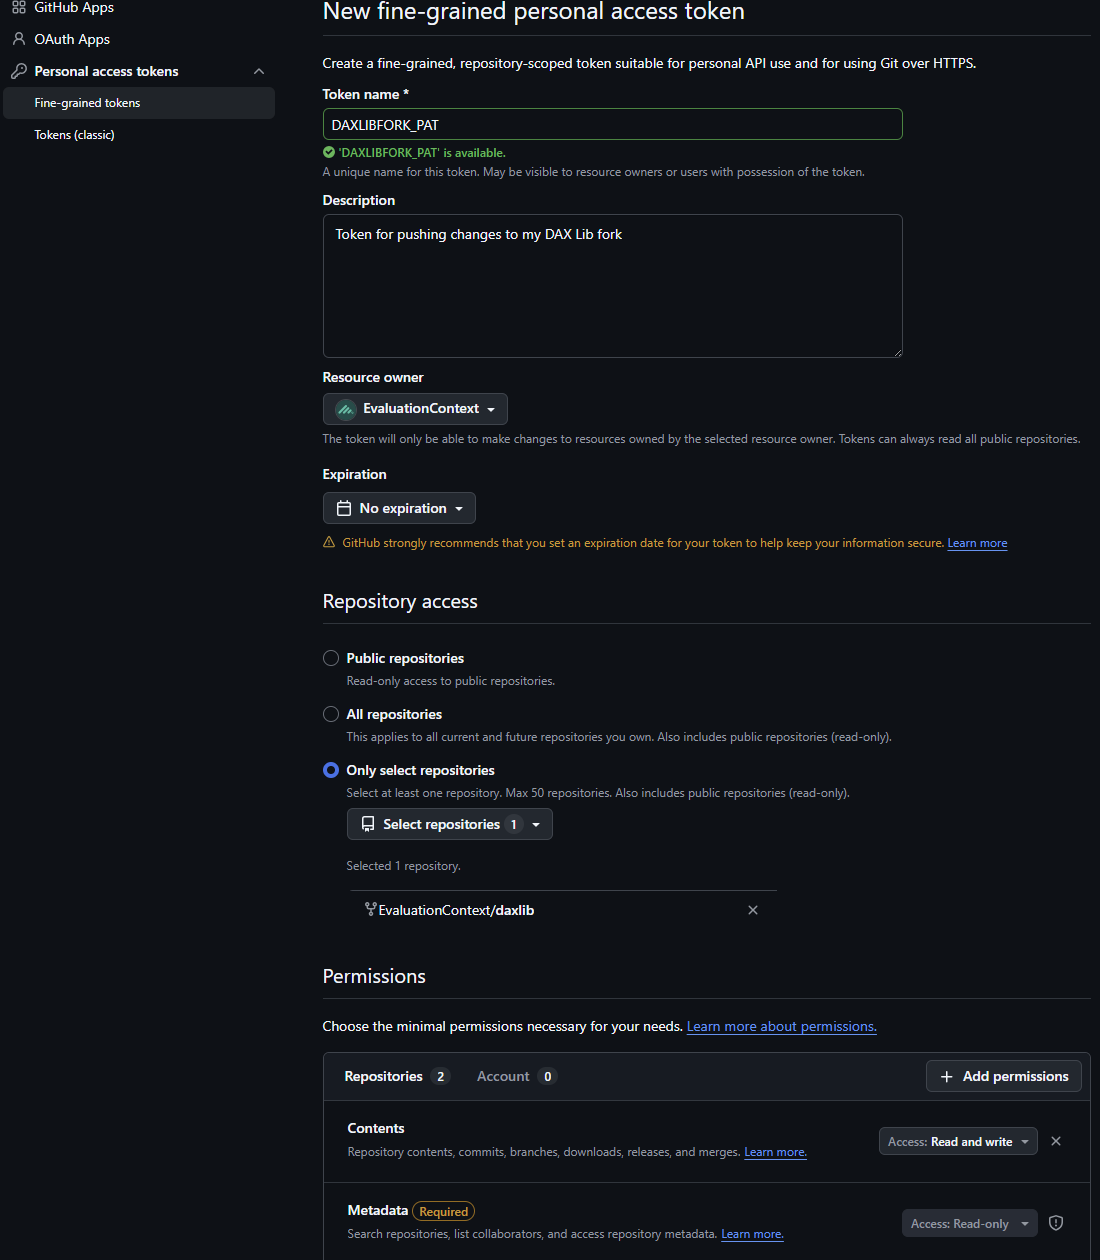
We first need to create a Personal Access Token, granting read/write permissions on evaluationcontext/daxlib.
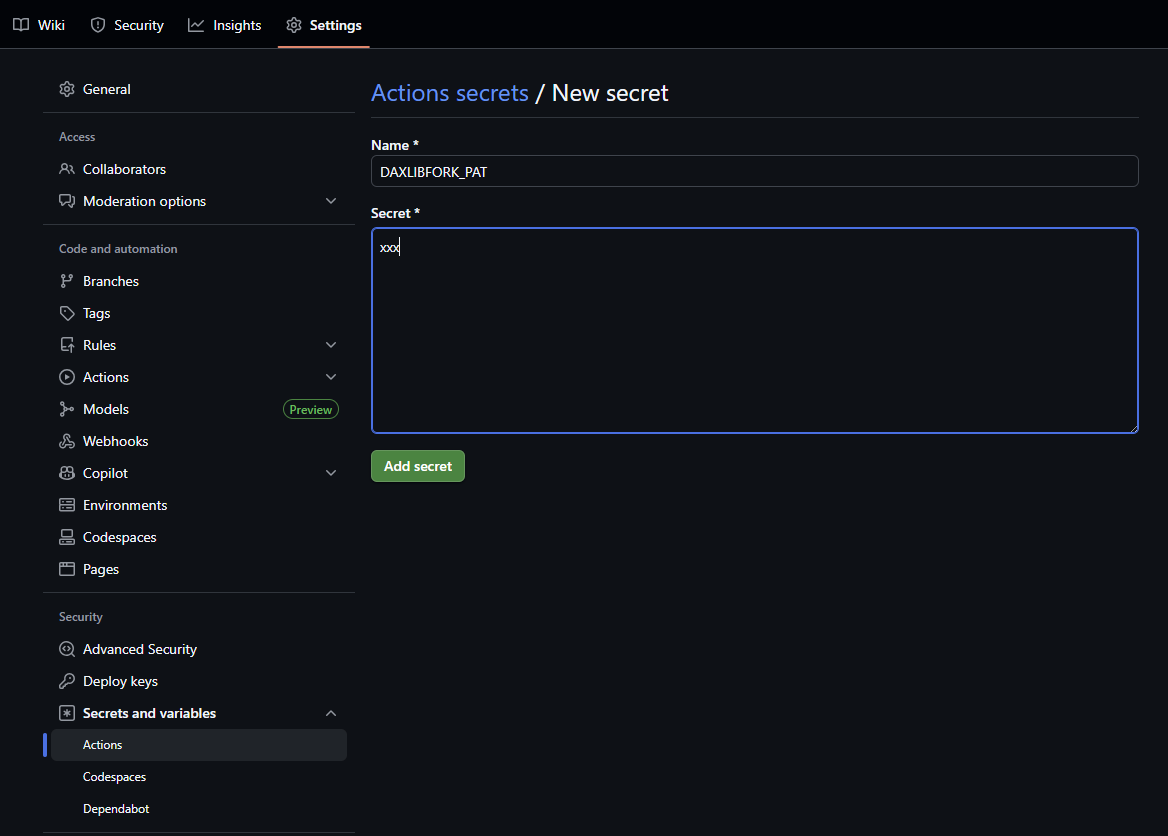
We add the token as a secret on evaluationcontext/evaluationcontext.colour, granting these permission to evaluationcontext/daxlib. So that the workflow run from evaluationcontext/evaluationcontext.colour can create a new branch in evaluationcontext/daxlib
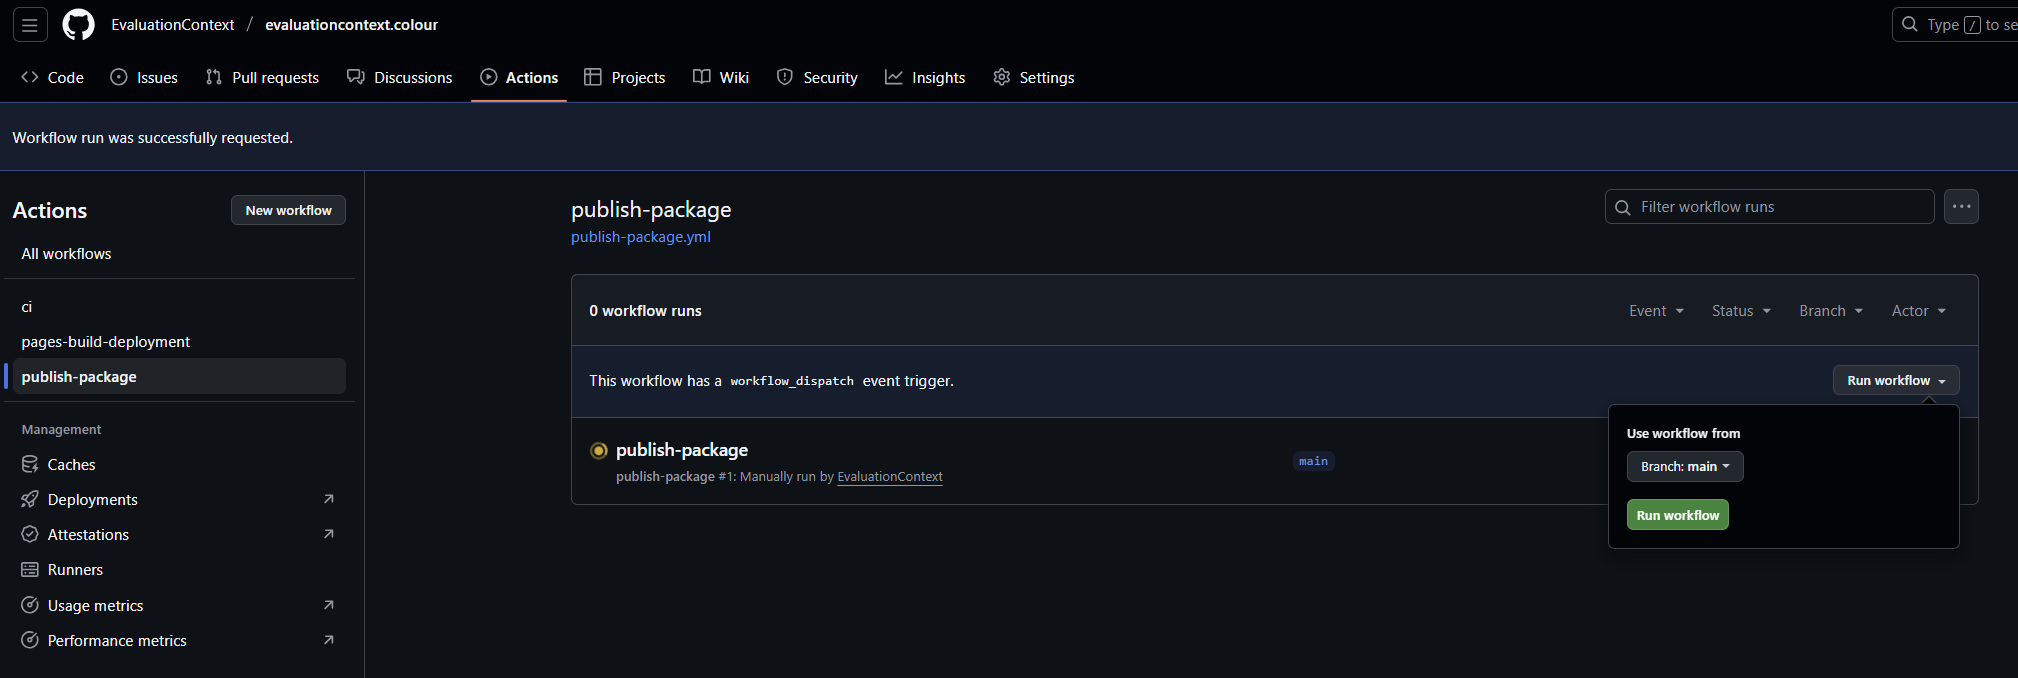
Navigate to actions, select publish-package and Run workflow.
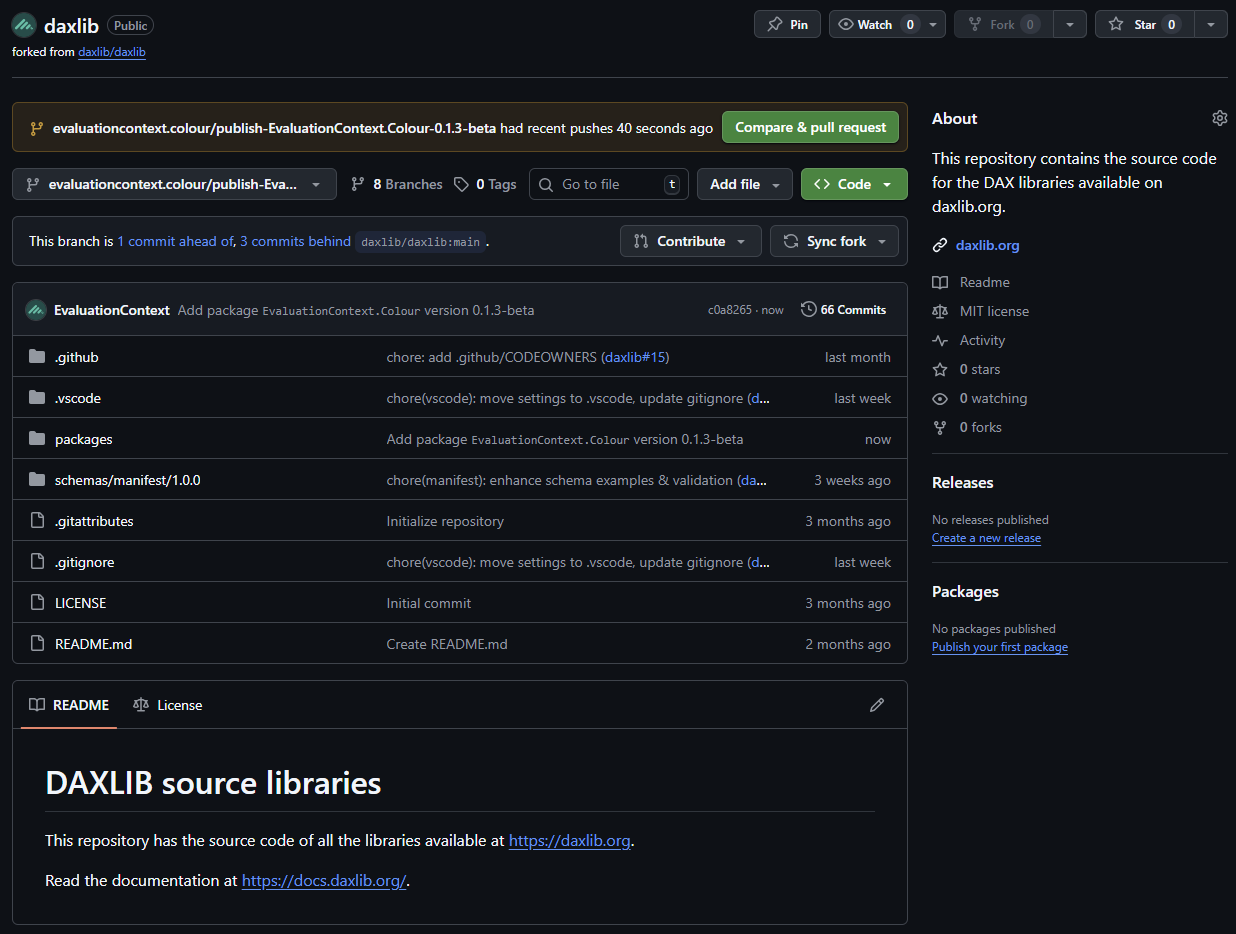
Once this has run we can navigate to our evaluationcontext/daxlib, and we confirm new branch ( evaluationcontext.colour/publish-EvaluationContext.Colour-0.1.3-beta) has been created.
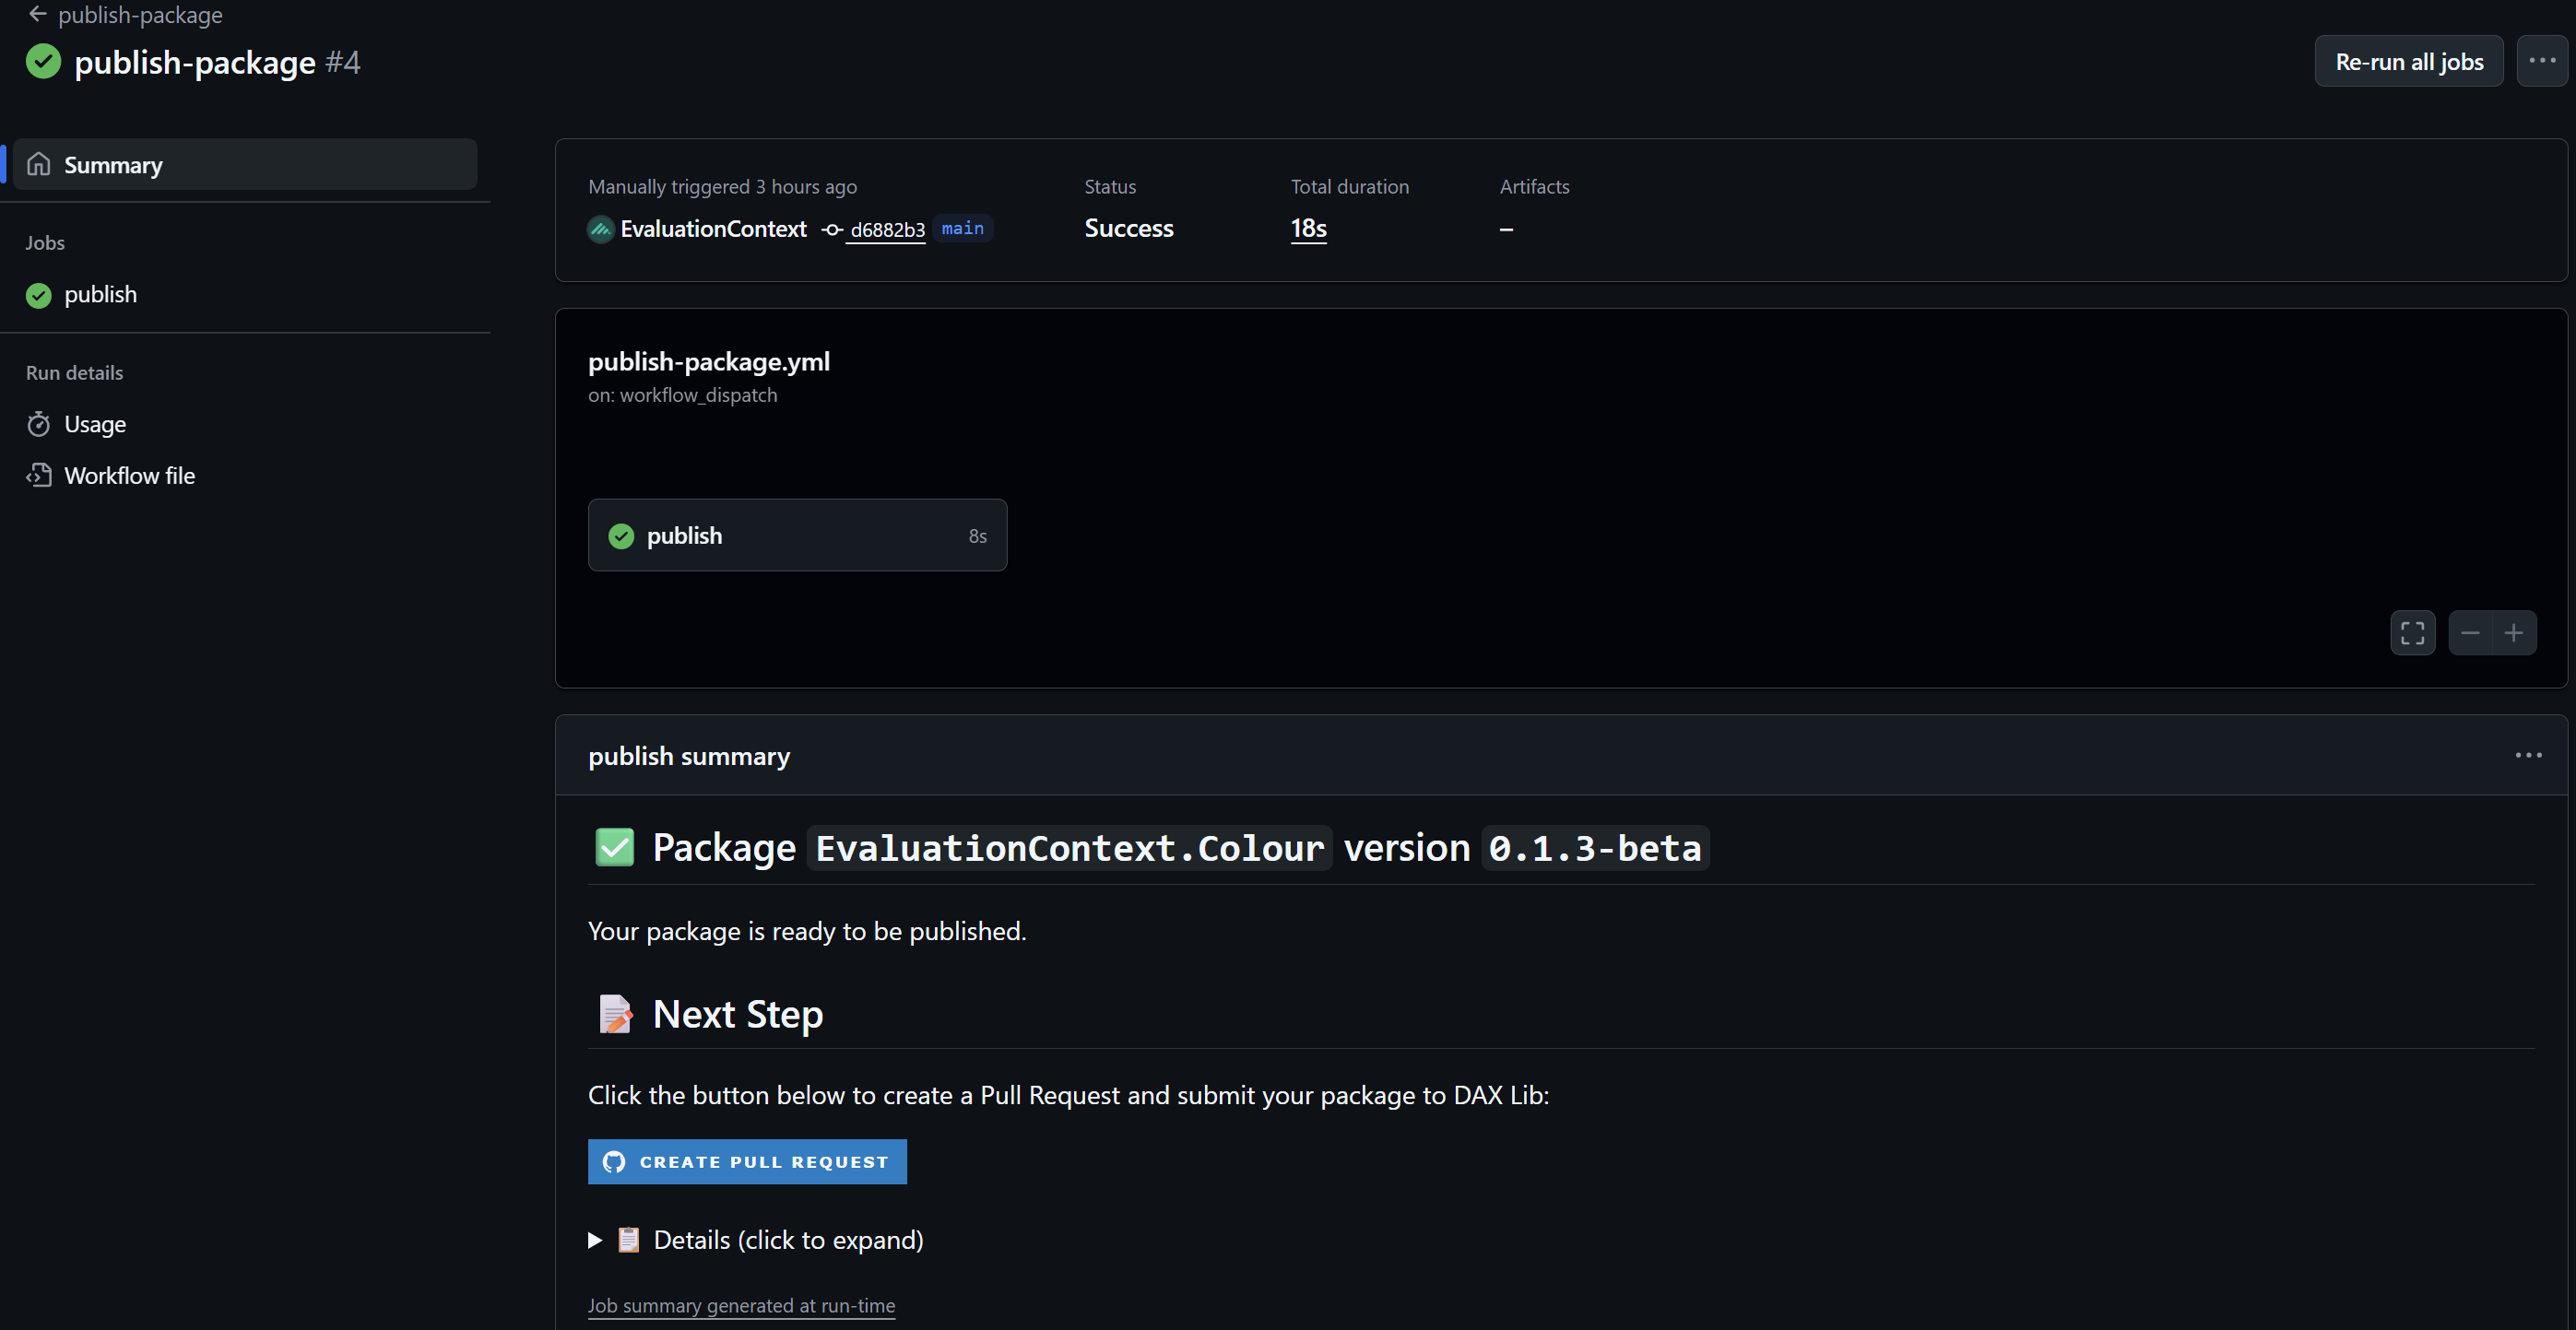
If we go back the actions section of evaluationcontext/evaluationcontext.colour and open the completed publish-package job, you can see we get the option to open a pull request.
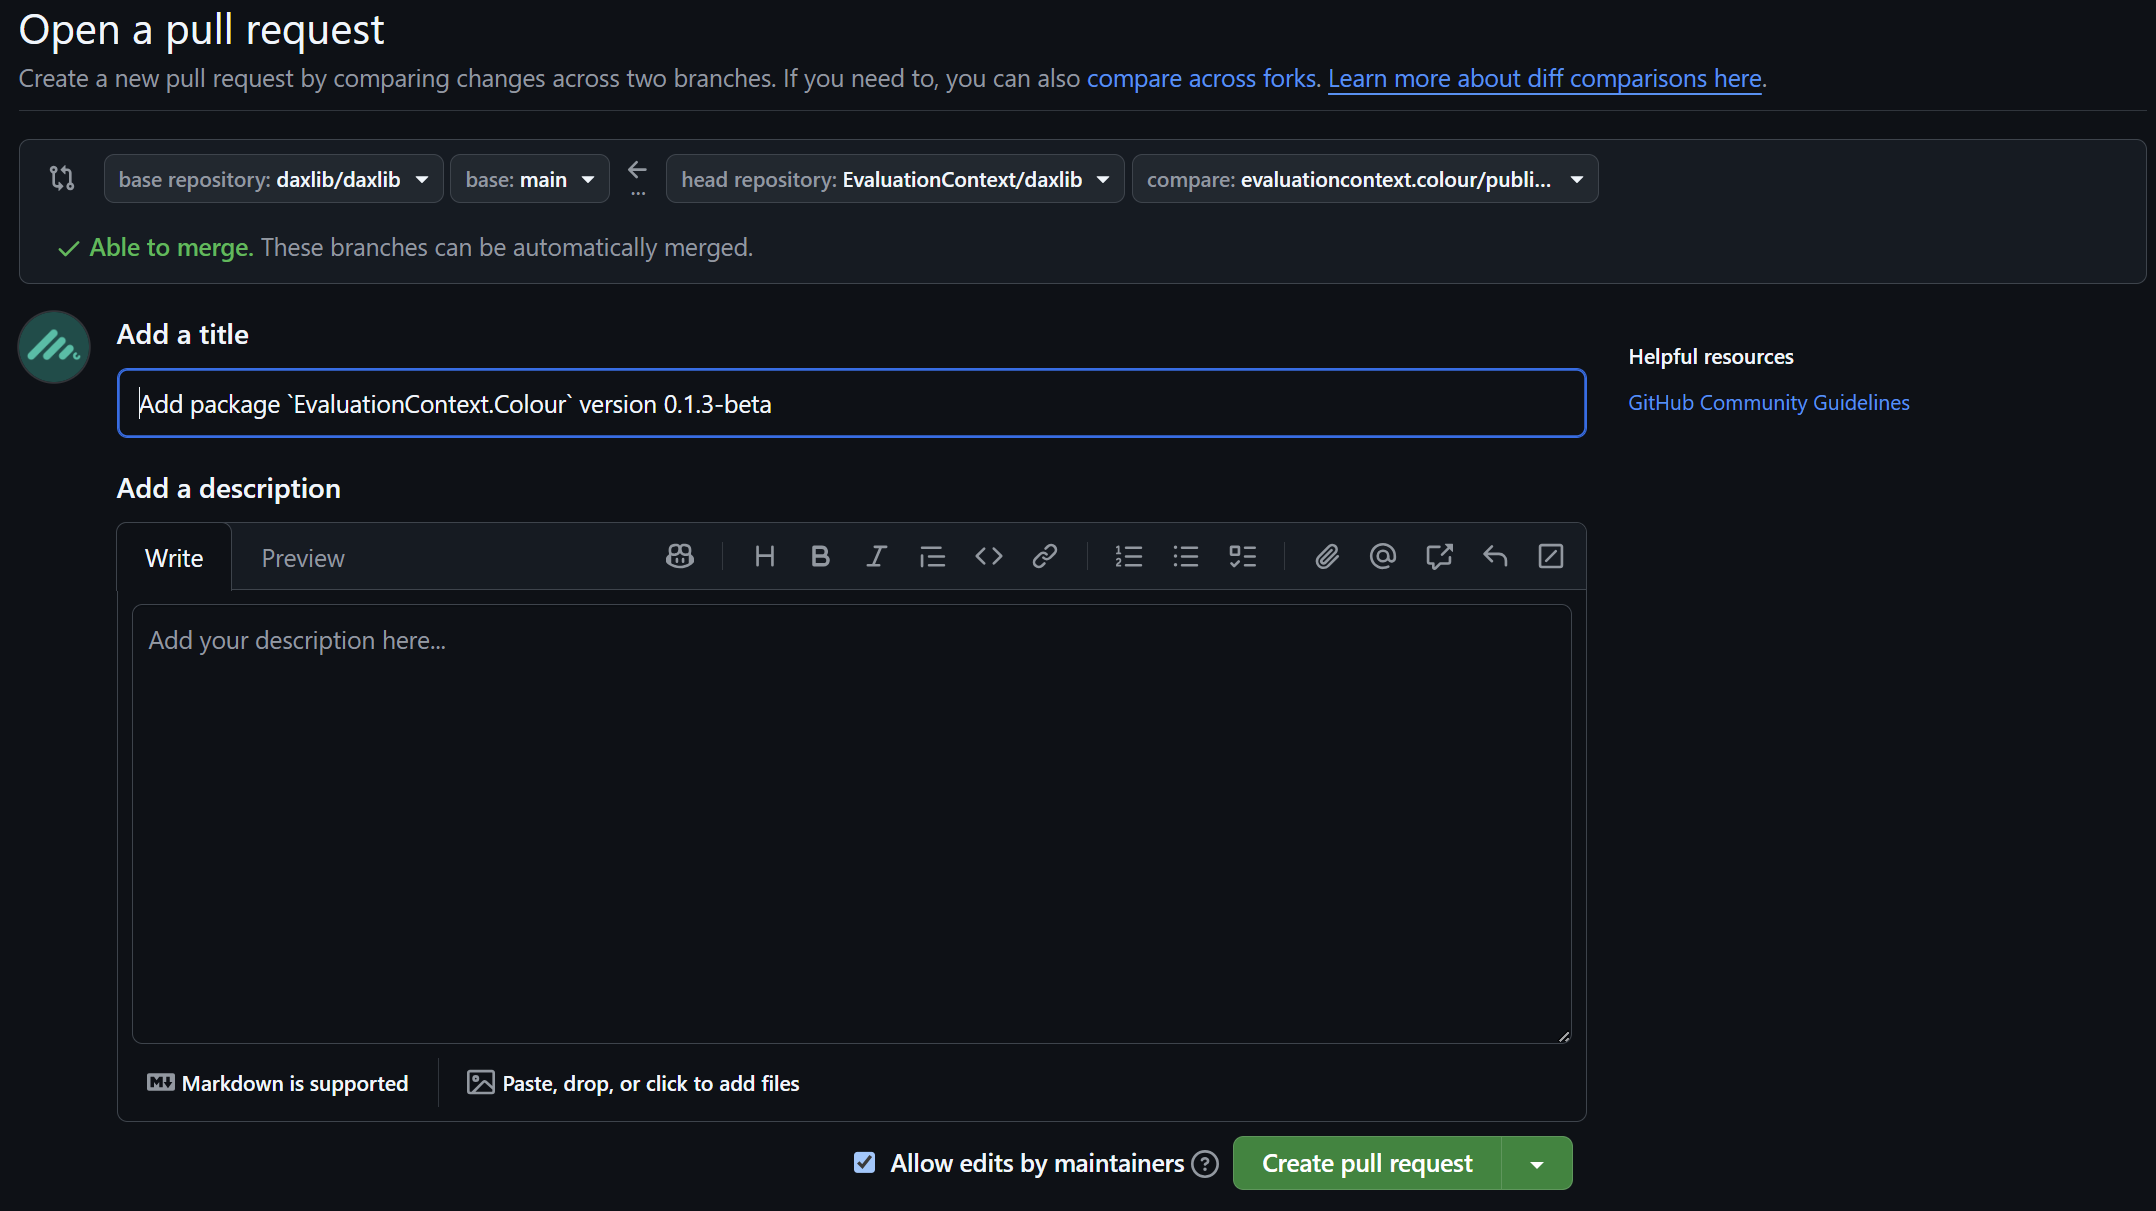
Then we can select Open Pull Request and Create pull request to create a pull request to daxlib/daxlib.
The pull request will then be reviewed by the DAX Lib maintainers. If changes are requested during the review:
- Apply the requested fixes to your code in the development repo, and commit them to your repository
- Re-run the
publish-packageworkflow - The pull request will be automatically updated
Once your pull request is approved and merged, your library will be automatically published on daxlib.org.